


Schedule I is a high-stakes tactical simulation game that has taken the gaming world by storm in late 2025. Set in a dystopian future where corporate espionage and government drug-enforcement policies have merged into a lethal "gray zone," the game tasks players with managing a clandestine organization. To succeed, you must balance the logistics of production, the danger of field operations, and the complexity of legal manipulation. This guide provides an in-depth "how-to" for players looking to dominate the leaderboards, navigate the intricate mission structures, and master the unique resource management systems that define the Schedule I experience.
 1. How to Initialize Your Clandestine Network
Your journey in Schedule I begins with the "Setup Phase," where you choose your organization’s founding ideology and home base. This choice is critical because it dictates your starting "Legal Immunity" and "Underground Influence." To master the early game, you should focus on a "Low-Profile" build. Selecting a base in a neutral territory with high "Digital Infrastructure" allows you to conduct initial research into synthetic compounds without alerting the global surveillance networks that hunt for "Schedule I" activities.
During the initialization, you must carefully select your first three operatives. The ideal starting team should consist of a "Chem-Tech" for production, a "Fixer" for social manipulation, and a "Ghost" for tactical retrieval. How you allocate your limited starting credits between equipment and bribery will determine your survival during the first "Regulatory Raid." Investing in encrypted communication channels early is non-negotiable, as any leak in your network during the first month can lead to a permanent game over.
2. How to Master the Synthetic Production Loop
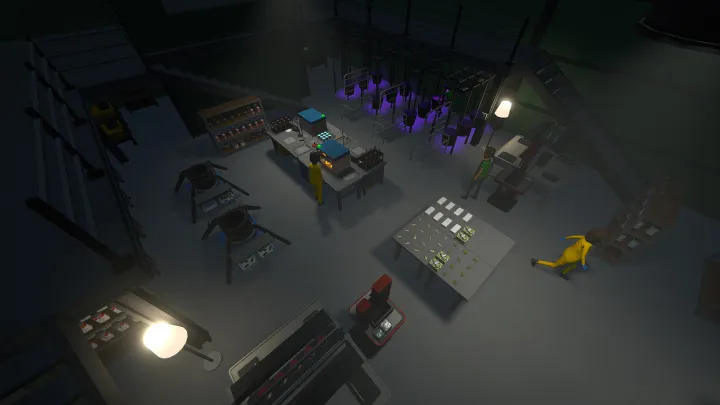
The heart of Schedule I is the lab. Your organization’s primary revenue and power come from the synthesis of experimental compounds. To optimize production, you must understand the "Stability vs. Potency" mechanic. Higher potency compounds fetch a higher price on the black market and provide stronger buffs for your field agents, but they are incredibly volatile. If the stability drops below 40% during the synthesis mini-game, you risk a lab explosion or a "Chemical Signature" leak that reveals your location to the authorities.
H3: Laboratory Optimization Strategies
- Ventilation Upgrades: Reduces the "Detection Meter" generated by constant synthesis.
- Redundant Coolers: Prevents volatility spikes during high-output production runs.
- Automated Centrifuges: Increases the speed of the loop at the cost of higher electricity consumption. By mastering the timing of the "Catalyst Injections," you can produce high-tier compounds with minimal risk. Always keep a stockpile of "Neutralizing Agents" in case a raid occurs while a batch is in the final stages of completion.
3. How to Navigate the Mission Map and Tactical Zones
Once your lab is producing, you must deploy agents to "Tactical Zones" to secure resources or sabotage rivals. The Mission Map in Schedule I is dynamic, with zones changing status based on government "Heat Levels." To execute a successful mission, you must choose your infiltration point carefully. Entering through a "Front Business" provides high cover but limits the gear you can carry, while a "Stealth Breach" allows for full tactical loadouts but triggers an immediate "Suspect" status.
H4: Tactical Zone Checkpoints
- The Perimeter: Use your Ghost to disable thermal cameras and sensor grids.
- The Interior: Move in a "Leapfrog" formation to ensure cover is always maintained.
- The Objective: Secure the target (data, blueprints, or precursors) and trigger the extraction timer immediately. How you manage your "Visibility Meter" during these missions is the difference between a clean extraction and a lethal standoff with SWAT teams.
 4. How to Utilize Compound Buffs for Field Operatives
Compounds are not just products to be sold; they are tools for your agents. In Schedule I, you can "Inoculate" your team with specific compounds to grant them superhuman abilities during missions. "Formula-X" might increase a Ghost's movement speed and silence their footsteps, while "Cinder-7" can boost a Fixer’s charisma during high-stakes negotiations. However, you must manage the "Withdrawal Threshold."
Using too many buffs in a single mission increases an agent's "Toxicity Level." If this hits 100%, the agent will suffer a permanent stat penalty or "Psychological Break." How to balance these buffs is an art form. It is often better to use a low-level "Focus Enhancer" for the duration of a mission than to pop a "High-Octane Berserker" stimulant only during a firefight. Always bring "Recovery Serums" in your tactical belt to lower toxicity before the extraction occurs.
5. How to Handle the "Heat" and Regulatory Pressure
In Schedule I, the government is the ultimate antagonist. Your every move generates "Heat." If your Heat Meter fills up, you will face an "Indictment Event," which freezes your assets and forces you into a "Legal Survival" mini-game. To prevent this, you must use your Fixer to "Launder" your influence. This involves donating to political campaigns, falsifying shipping manifests, and intimidating witnesses before they can testify.
- Bribery: Effective for immediate heat reduction but expensive.
- Public Relations: A slow-burn strategy that lowers the rate at which heat is generated by your actions.
- Blackmail: Risky but can completely wipe a specific legal threat from the board. Mastering the "Shadow Lobbying" menu is essential for late-game survival, where your operations become too large to hide completely. You must transition from being a criminal to becoming "Too Big to Fail."
6. How to Upgrade Your Base and Secure the Perimeter
As your organization grows, your initial hideout will no longer suffice. You must upgrade to a "Tier 3 Compound." This allows for multiple labs, housing for more agents, and advanced defense systems. How you design your base layout is vital; a centralized "Data Vault" surrounded by "Kill Zones" and "Decontamination Chambers" will ensure that even if a raid reaches your interior, your secrets remain safe.
H3: Defensive Infrastructure
- EMP Emitters: Disables incoming drones and electronic hacking devices.
- Automated Sentry Turrets: Provide 360-degree protection against breach teams.
- Hidden Escape Tunnels: Allows your high-value agents to evacuate if the base is 90% compromised. Always invest in "Ghost Servers." These off-site backups ensure that even if your main base is destroyed, you retain your research and blueprints, allowing you to restart in a new territory with your progress intact.
7. How to Dominate the Black Market Economy
The Black Market in Schedule I is a player-driven or AI-influenced economy where the price of compounds fluctuates. To maximize profit, you must understand the "Scarcity Principle." If every player is selling "Blue-Ice," the price will plummet. You should look for "Market Gaps"—specializing in "Neuro-Stabilizers" or "Combat Regeneratives" when supply is low. Use your Fixer to plant "Market Rumors," artificially driving up the demand for your specific products.
- Spot Trading: Selling small batches for immediate cash.
- Futures Contracts: Agreeing to provide a large shipment in 30 days for a premium price.
- Bartering: Trading compounds directly for high-end tactical gear or "Restricted Precursors." Success in the economy allows you to fund "Mega-Projects," such as launching your own satellite for un-hackable communications or purchasing a seat on the "Global Executive Council."
8. How to Execute "Shadow Operations" and Counter-Intelligence
Shadow Operations are clandestine missions where you don't send your main team. Instead, you hire "Expendable Mercenaries" to hit rival organizations. This is the primary "How-to" for maintaining dominance without risking your core assets. You must learn how to "False Flag"—making a hit on a rival look like it was performed by the government, which triggers a heat spike for them while keeping you clean.
H4: Counter-Intelligence Tactics
- Mole Planting: Sending a low-level agent to join a rival faction to leak their research data.
- Encryption Cracking: Using your Chem-Tech to brute-force a rival’s digital vault.
- Safe-house Sabotage: Planting tracking devices in a rival’s extraction zone to steal their loot. Maintaining a high "Paranoia Score" among your rivals is a valid strategy. If they are too busy looking for moles in their own ranks, they won't have time to interfere with your production cycles.
 9. How to Manage Agent Fatigue and Psychological Health
Your agents are your most valuable resources, but they are human. Schedule I features a "Stress System" that tracks an agent's mental state. Witnessing violence, suffering injuries, or being under constant legal pressure increases their "Burnout Meter." If an agent burns out, they may leak info to the police or simply disappear with your gear. How you manage their downtime is just as important as how you manage their missions.
- Recreation Facilities: High-end lounges and gyms in your base lower stress daily.
- Counseling Sessions: Use your Fixer to "re-align" an agent's loyalty.
- Rotation Schedules: Never send the same team on more than three consecutive high-heat missions. Rewarding your agents with "Bonuses" or "Retirement Plans" increases their loyalty, making them immune to rival recruitment attempts and ensuring they remain focused during the final, high-pressure objectives of the campaign.
10. How to Achieve the "Absolute Control" Endgame
The final goal of Schedule I is to achieve the "Absolute Control" status, where your organization essentially replaces the government’s regulatory arm. This requires completing the "Grand Synthesis"—a compound so complex it requires precursors from every tactical zone on the map. You must defend your primary lab against a "Global Siege" while the synthesis timer counts down.
How you prepare for this final stand determines your success. You must have maximum base defenses, a fully loyal team of Tier 5 agents, and enough political influence to delay the "Siege Reinforcements." If you succeed, the game ends with your organization becoming the shadow ruler of the world, effectively ending the "Schedule I" status by making your activities the new legal standard. It is the ultimate test of logistics, tactical prowess, and strategic planning.
Conclusion
Mastering Schedule I is a complex balancing act between the criminal underworld and high-level corporate management. By mastering the production loop, minimizing heat through social manipulation, and maintaining the psychological health of your elite agents, you can build an empire that transcends the law. From your first small lab to the final "Grand Synthesis," every decision impacts your legal standing and your survival. Use this guide to ensure your organization remains a step ahead of the regulators and a level above your rivals. In the world of Schedule I, the only way to avoid the schedule is to write the rules yourself.